


First you need to download Picasa. It’s free and it should be easy to figure out how to get your pictures from your files into Picasa. I’ve tried almost everything, and I think it is the best (and most self-explanatory) FREE editing system out there…especially if you are using Blogger.
Once you download Picasa, it is easy to figure out how to "Import" (there's a button) your pictures from your files into Picasa.
Then, you select a photo and press the Collage button on the top of the window. (You can edit your pic first if you want....see the left hand side for tons of options.)
See that little grey circle on the photo? That allows you to make the photo bigger or smaller and also allows you to manipulate the angle…crooked or straight, and allows you to move it everywhere. If you look in the Settings box, you can also chose to add a white border, or a Polaroid border, or create a shadow on your photo. I chose to go with "picture pile" and moved my photos around. There are many options. After this tutorial I will show a previous header of mine that I did and used "mosiac".

When I’m set I press Create Collage.

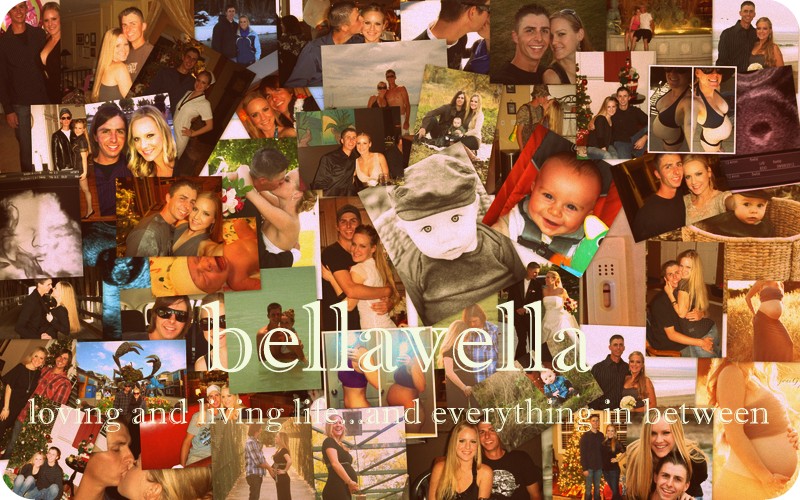
Then find the "Text" button and press that. Play around and see what you like best…this is the “funnest” part…you can move the text where ever you want (even on top of the photos), make it whatever size you want (keep it on the page!), pick the opacity of the text, and determine the color you want it…it has the same grey circle that you manipulate around.
There are two ways you can do this next step... the first :After you have your words down, click the Apply button and you will go back to the basic Edits.
You also have the option to leaving a white blank space under your collage and adding text to the lower half of the image and into the white space. This is created by cropping...You are going to Crop your Collage so it looks like a header, not a huge photo, so press Crop. I make it really even on all sides and bring the crop right up under the writing.

NOW, go to your BLOG via blogger and press the Layout tab. Press Edit on the header part (where your title is.)
Choose your Image (your collage) from your Files. Make sure you press the “Instead of title and description” button first, and make sure the Shrink To Fit button is NOT checked before you upload your picture.
No comments:
Post a Comment